Note: I anticipate that there will be a lot more detail as the project progresses. Rather than make one terribly long page, I will break the project into several pages.
To benchmark the timing of the project, on Saturday 4/19/14 I removed the cab from the frame. Everything documented so far has been accomplished prior to that date.
I debated about removing the cab from the frame. Most everything was disconnected, but lifting the cab off the frame is not a trivial task. This is the fourth frame-off project I have done and along the way, I have fabricated special fixtures to make the process easier and safer. That said, the cab is way off the ground and lifting it higher gets your blood pumping.
Exposing the full frame will make several sub-projects much easier.
The next process was cleaning off 55 years of caked on (dried and hardened) grease. I researched various methods of removing this "stuff". One of the best candidates was oven cleaner. I had tried it before without much success, but the oven cleaner combined with a powerful pressure washer got the job done.

")

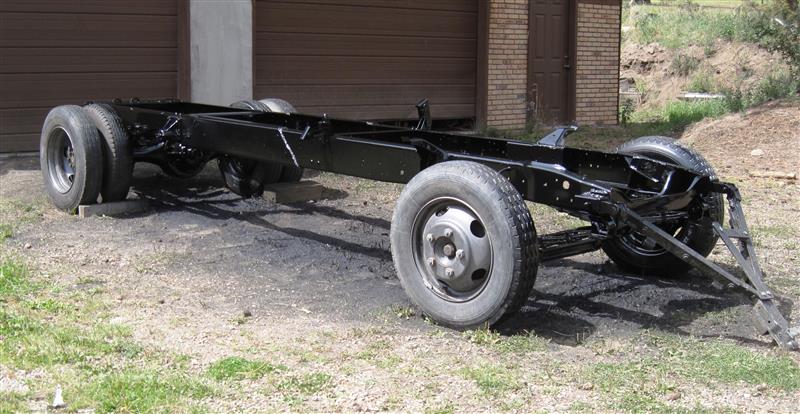
The photos above show the cleaned and painted frame. I used por 15 as a base then coated it with Rustoleum.
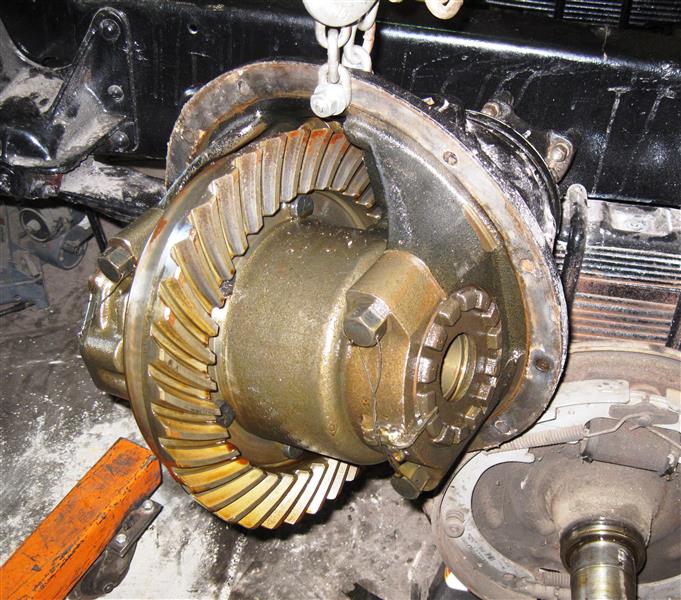
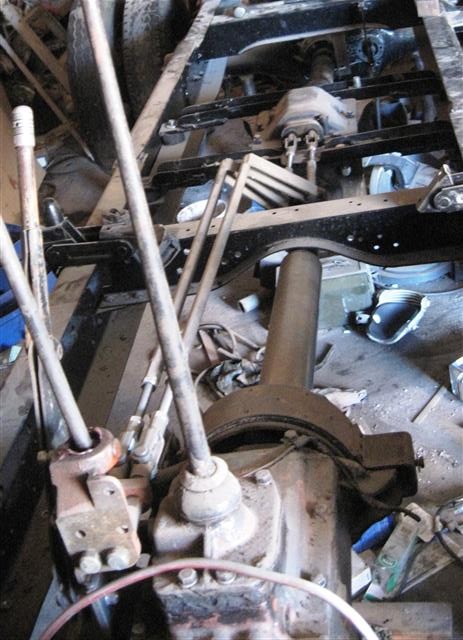
One of the neat things about working with a bare frame is that working on running gear is easier. I decided to pull the rear end and check the gears. The ring and pinion were in good condition. I reduced the pinion backlash a bit and reinstalled the third member.
")
")


I knew that I needed to fabricate two new drive shafts. The good news that the various yokes (different sources) were all made for 3 1/2 inch tubing. The bad news is that two needed to be machined for use of 0.095 wall tubing (see photo of yoke chucked in the lathe). The second photo shows the yokes installed in tubing for the front shaft. I still need to check the run out and weld the tubing to the yokes.


")
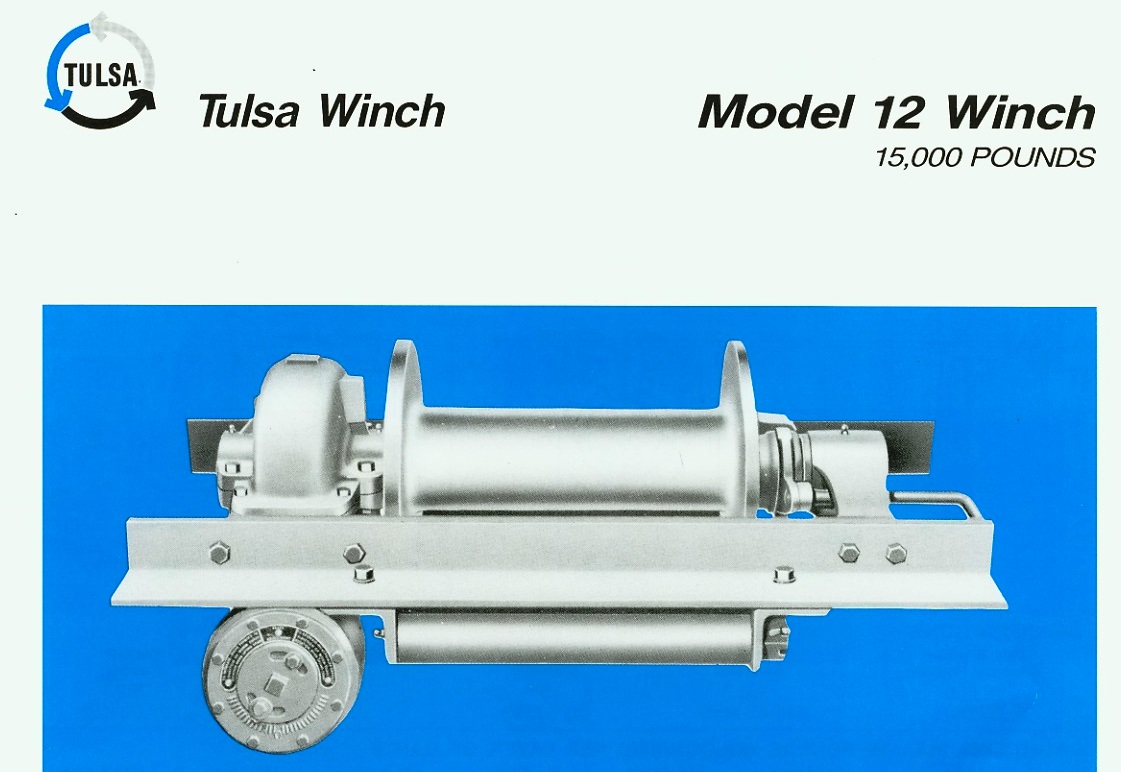
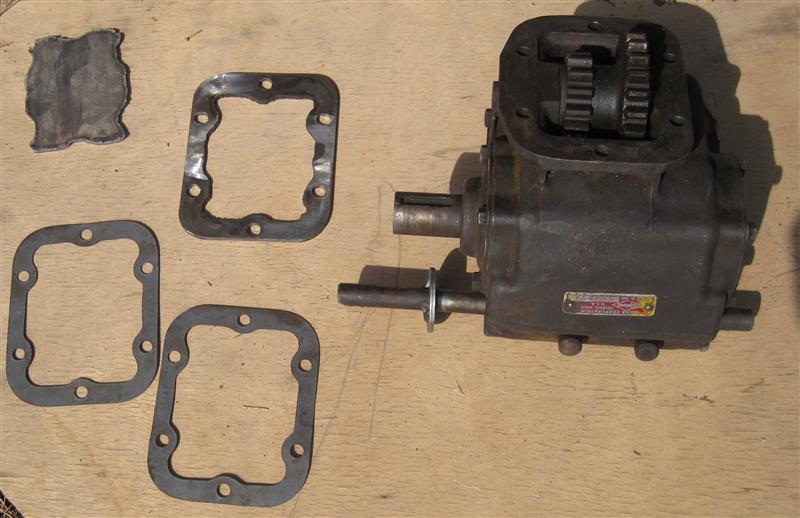
One of the fun activities with this kind of project is searching out parts. I found a Tulsa PTO winch on Craigslist and just had to buy it. Then as I thought about how I might use the winch (gin pole lift), I realized that my current PTO one direction box would not work. I did a ton of research and could not find what is called a forward/reverse PTO box for the driver's side PTO on the T35 transmission. The transmission has a passenger side PTO opening and after a bunch more research I discovered that the IHC T35 transmission was designed by Fuller and they used their large transmission PTO configuration on the passenger side. That gave me a pretty good choice of PTO boxes. I had to make a spacer to get the proper gear center distance/backlash, but that was pretty straight forward.
")
")
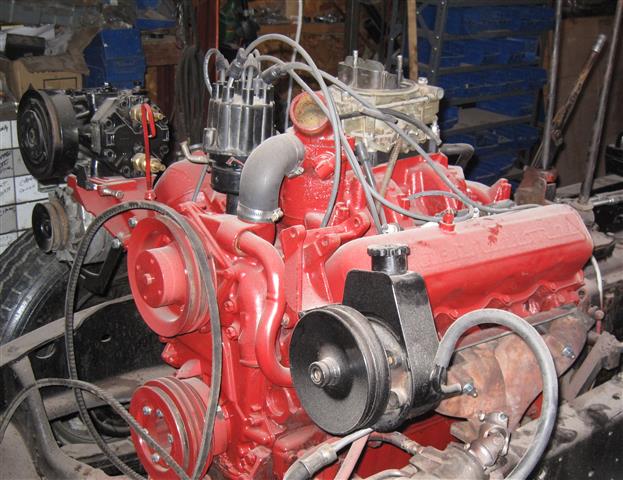
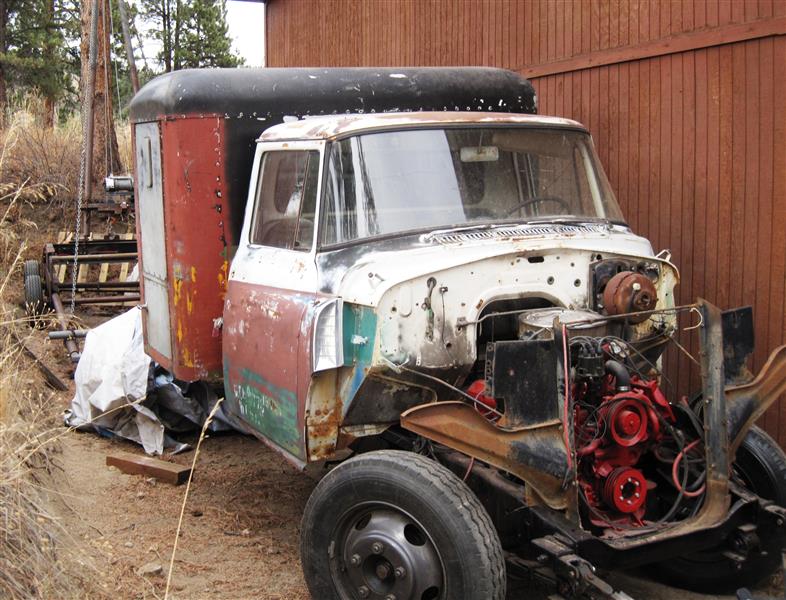
The two photos above show the engine in the present condition (ready to start with minimal work) and the two shift levers. The shift linkage for the Brownie auxiliary transmission functions fine, but I am going to redo the linkage with a bell crank system that will make the linkage more stable and also make the shift pattern correct.
I had hoped to get more done on the truck this summer (2015), but I decided to work on the '56 Chevy so that I could get it back on the road. As it turned out, I ran out of time on both projects when the weather turned cold. The shop is not heated and I move to the garage in the winter (heated) and continue to work on the 47 Buick project — project pages here.
During the summer of 2016 I was not able to spend much time on this project. I was able to fabricate the driveshafts and the Brownie bell crank system (both need a bit more work to complete).


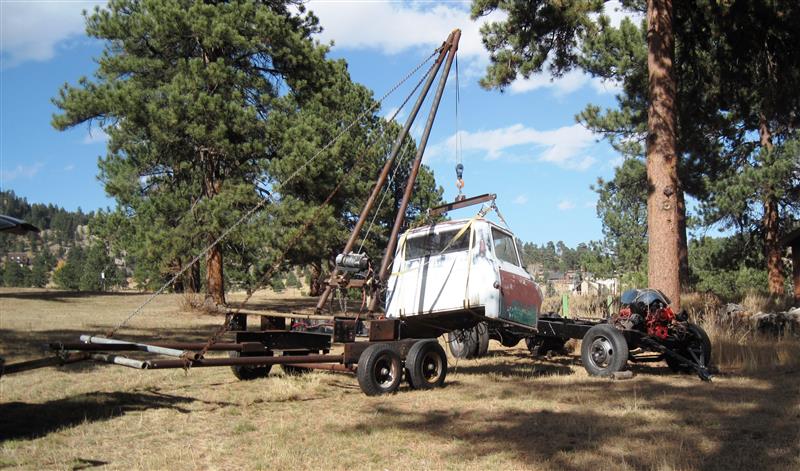
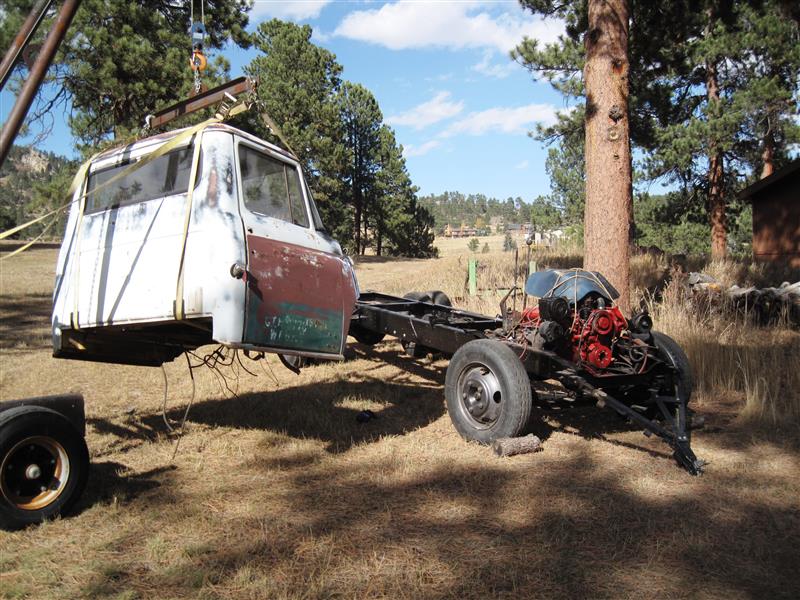
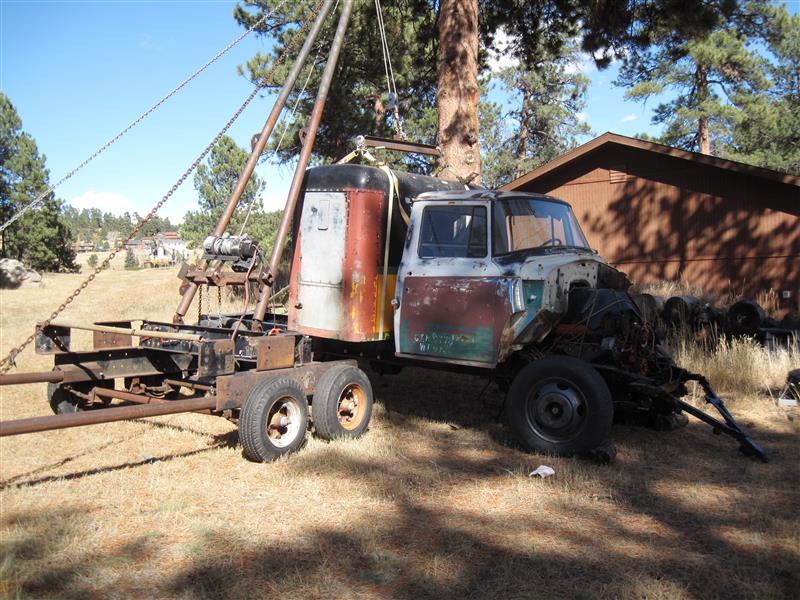
In the gallary above you will see my installing the cab and sleeper on the chassis. I was using a gin pole trailer that I had made a few years ago. It sure made the intallation much easier. The truck will now go under a tarp for the winter.
Update: November 29, 2020
Since I last updated this page a few years ago, I have been steadily working on my Binder. I will try to update the details in the near future, but I thought I would post a couple of pictures of the truck that were taken a few months ago.
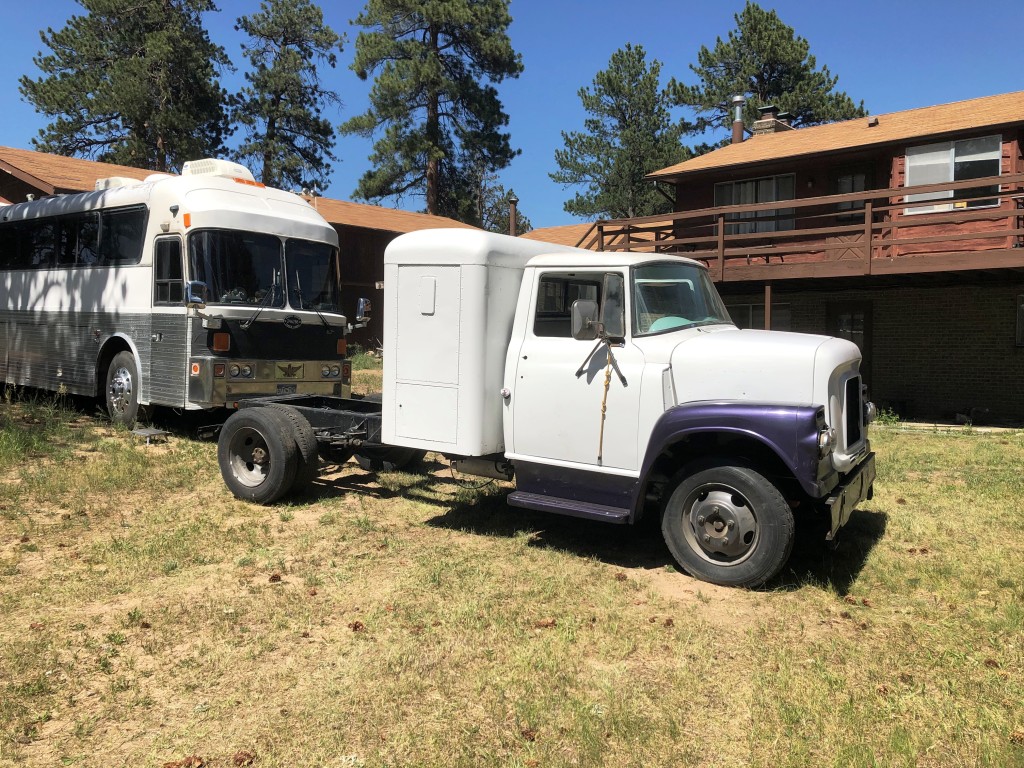

The above photo was taken on July 1, 2020. The sleeper is mounted but the bed is not yet attached. In the left of the photo is our 84 Eagle Bus that I converted several years ago.
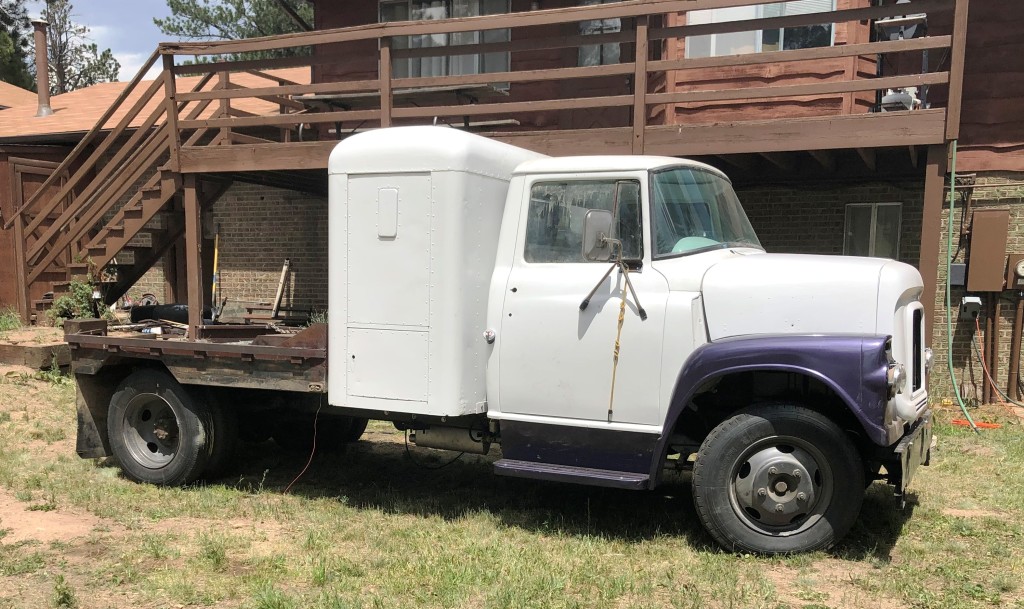
The above photo was taken a day later with the original bed installed. I hope to build a custom bed, but to get the truck on the road, I decided to use the old bed.
Since these photos were taken, I have finished the installation of the headlights, old style mirrors, and painted the bed. I have been driving the truck in the neighborhood and it seems to run well.
I hope to put some more miles on it this winter. There are still a lot of finish details, but they will probably have to wait till next spring.