Warning: reading the minutiae that follows could be dangerous to any attempt to stay awake {big grin}
Note: most of the photos on this page (including the photos in the galleries) are thumbnail. You can click on them to enlarge the photo.


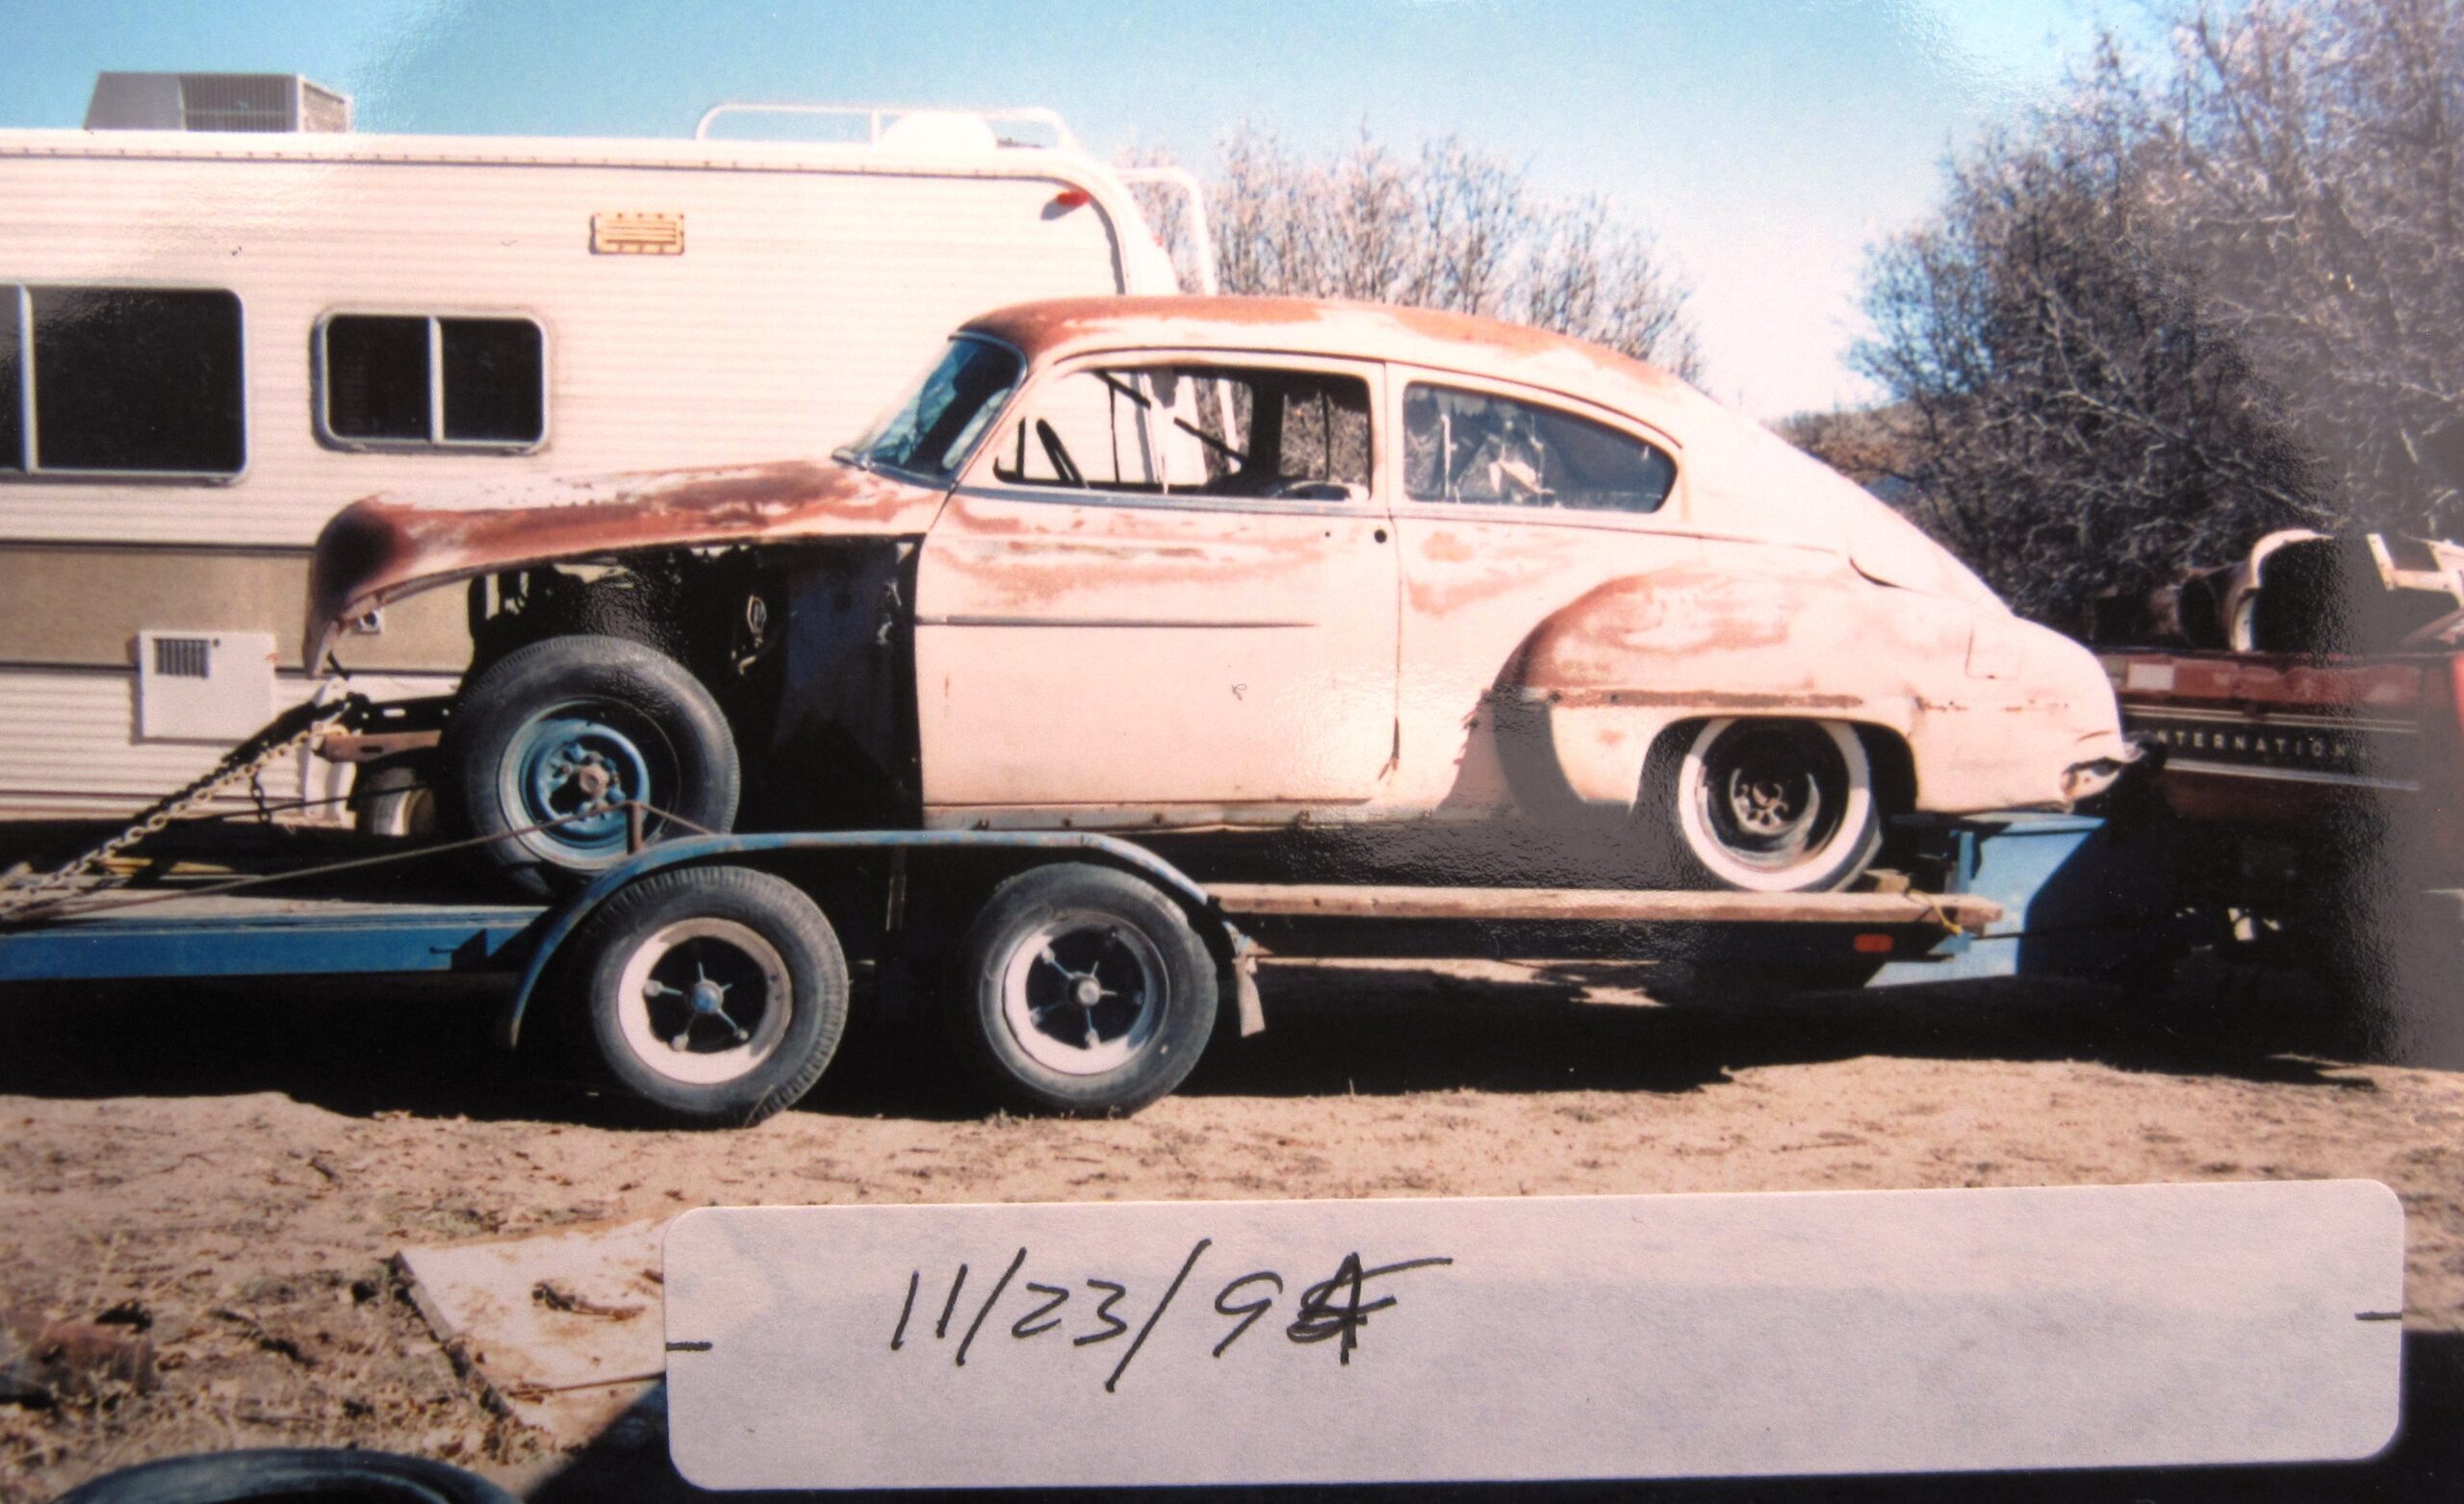
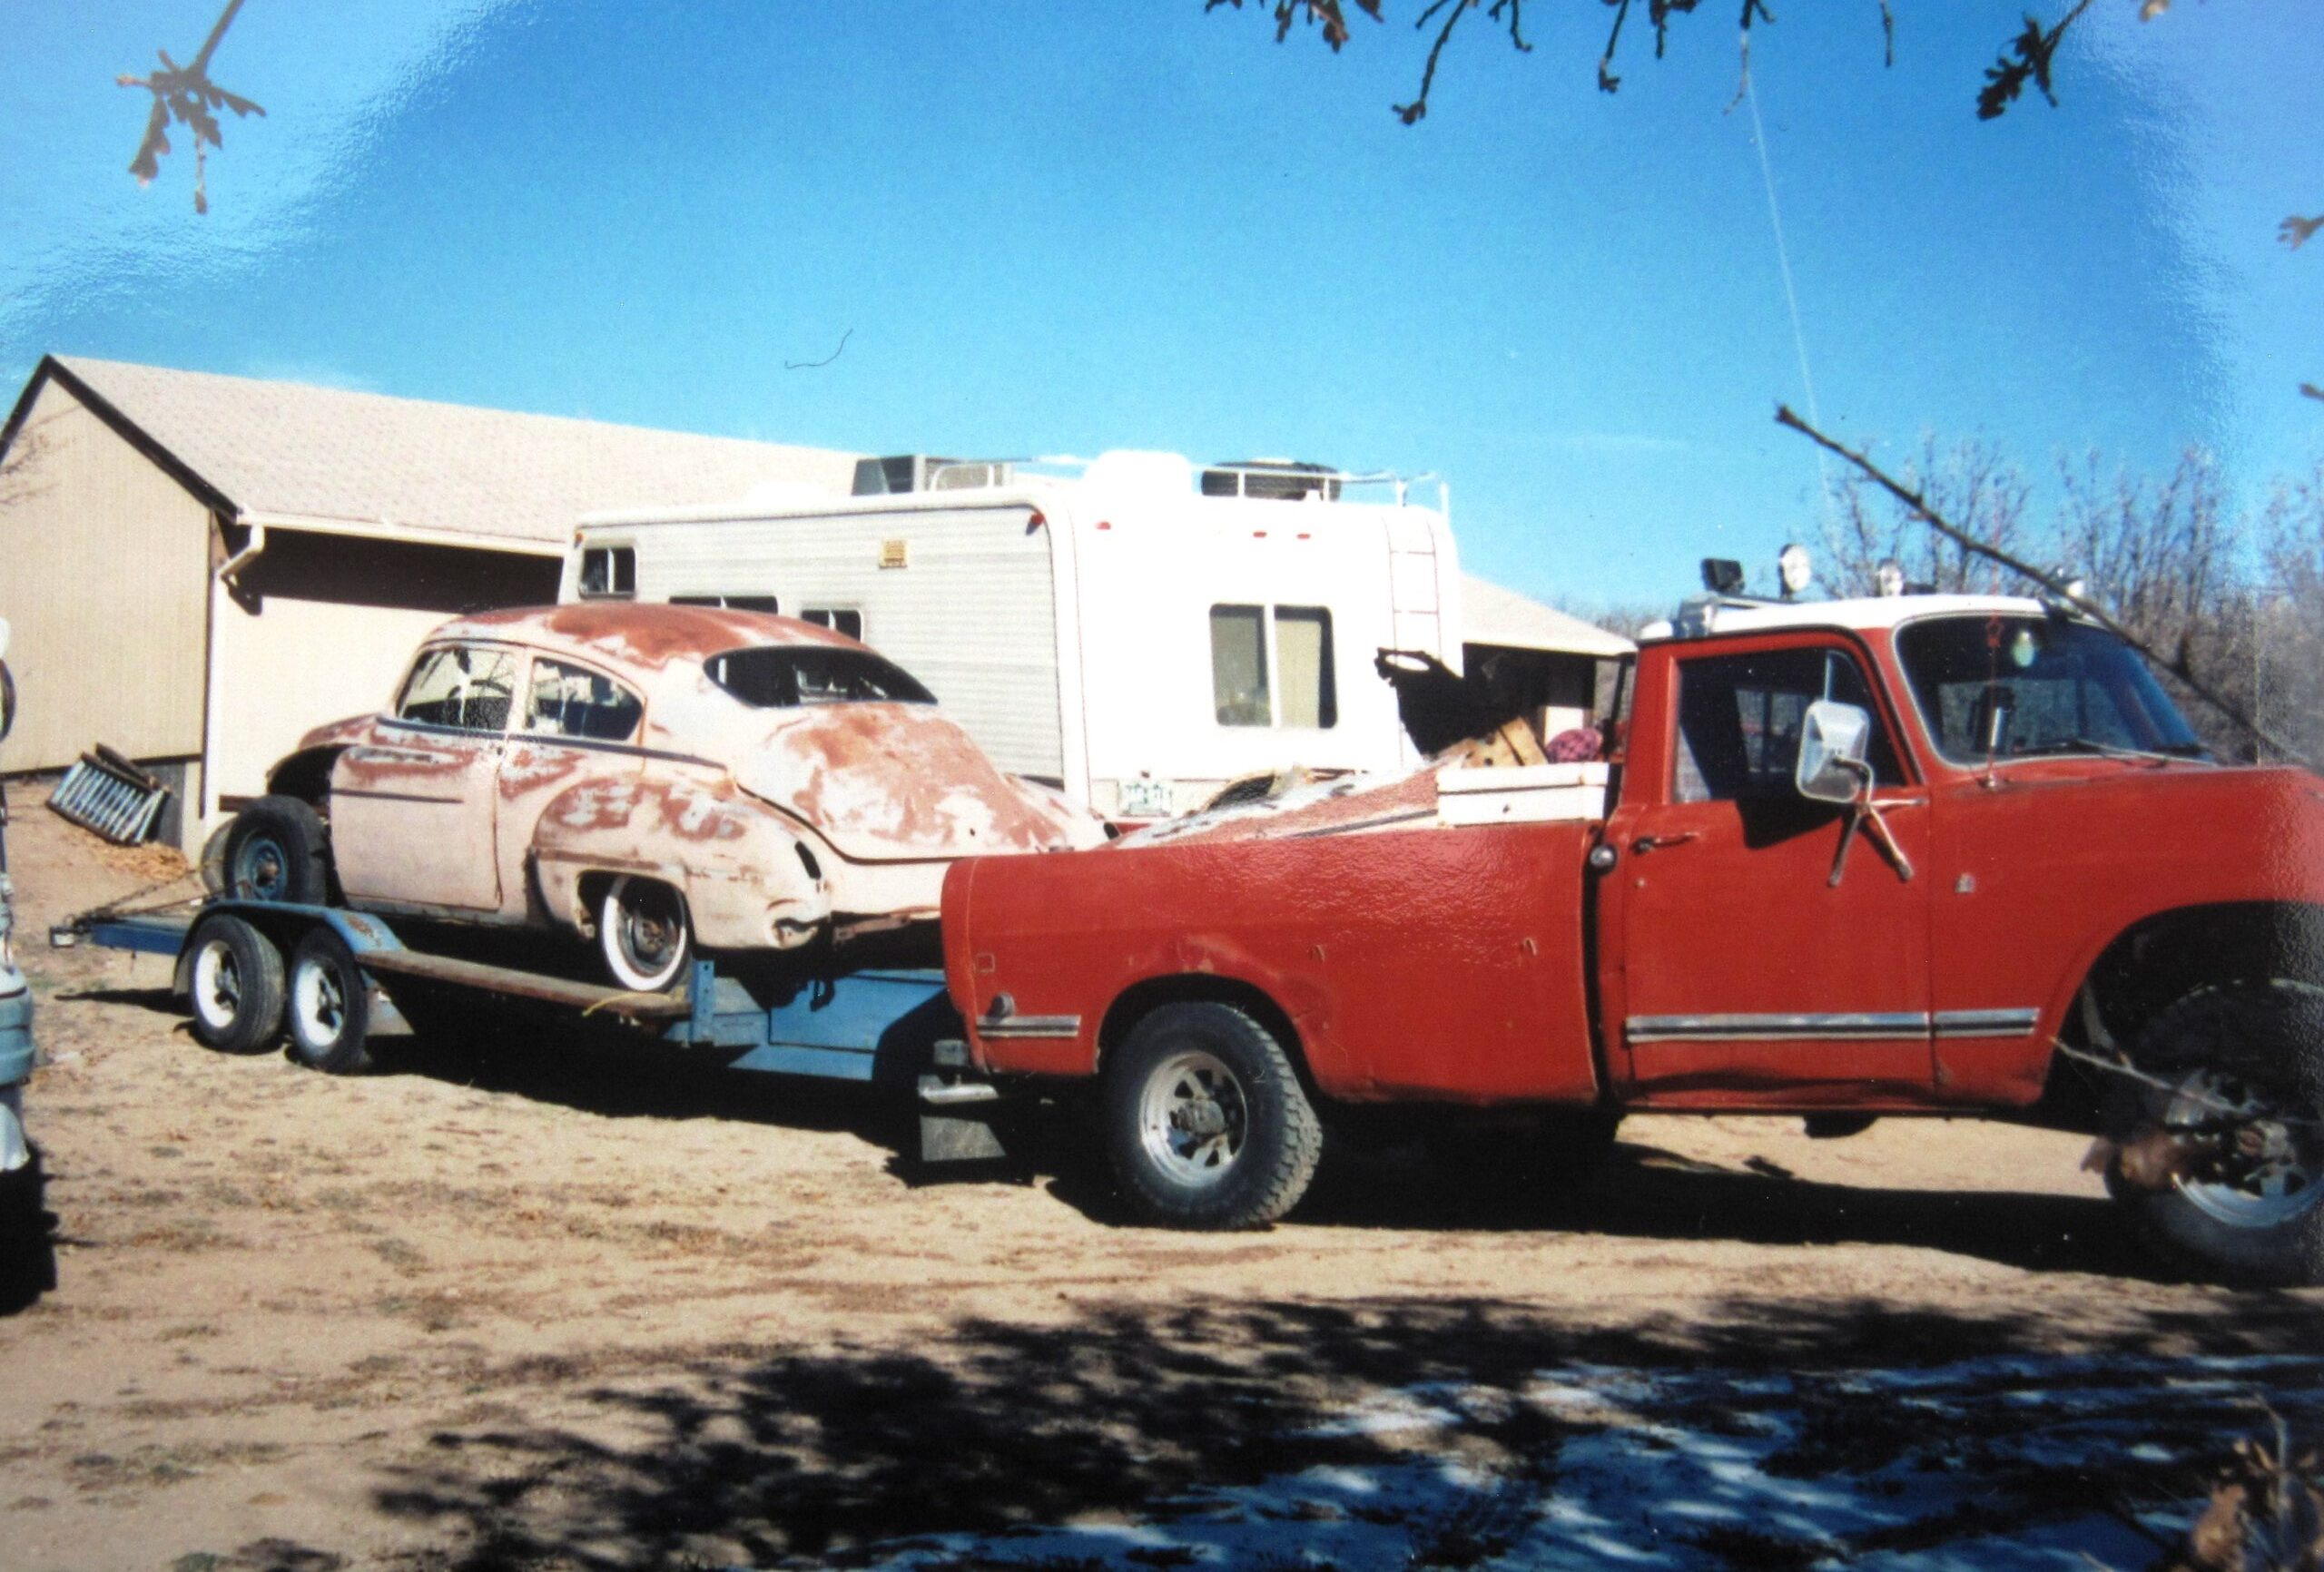
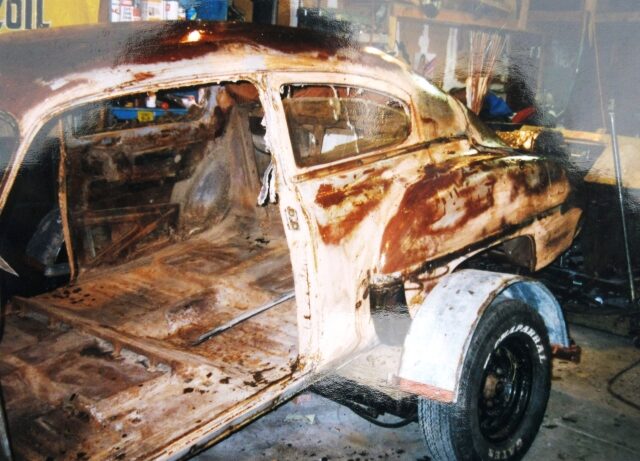
As noted on the main ’50 Olds page (see menu below) I mentioned that I picked up a “fastback” in November of 1994. As seen in the pictures above, it was missing lots of parts, but the main body was in great condition. The car had been retrieved from a wrecking yard by a good friend of mine. The car ended up in the wrecking yard because of significant right front frame damage.
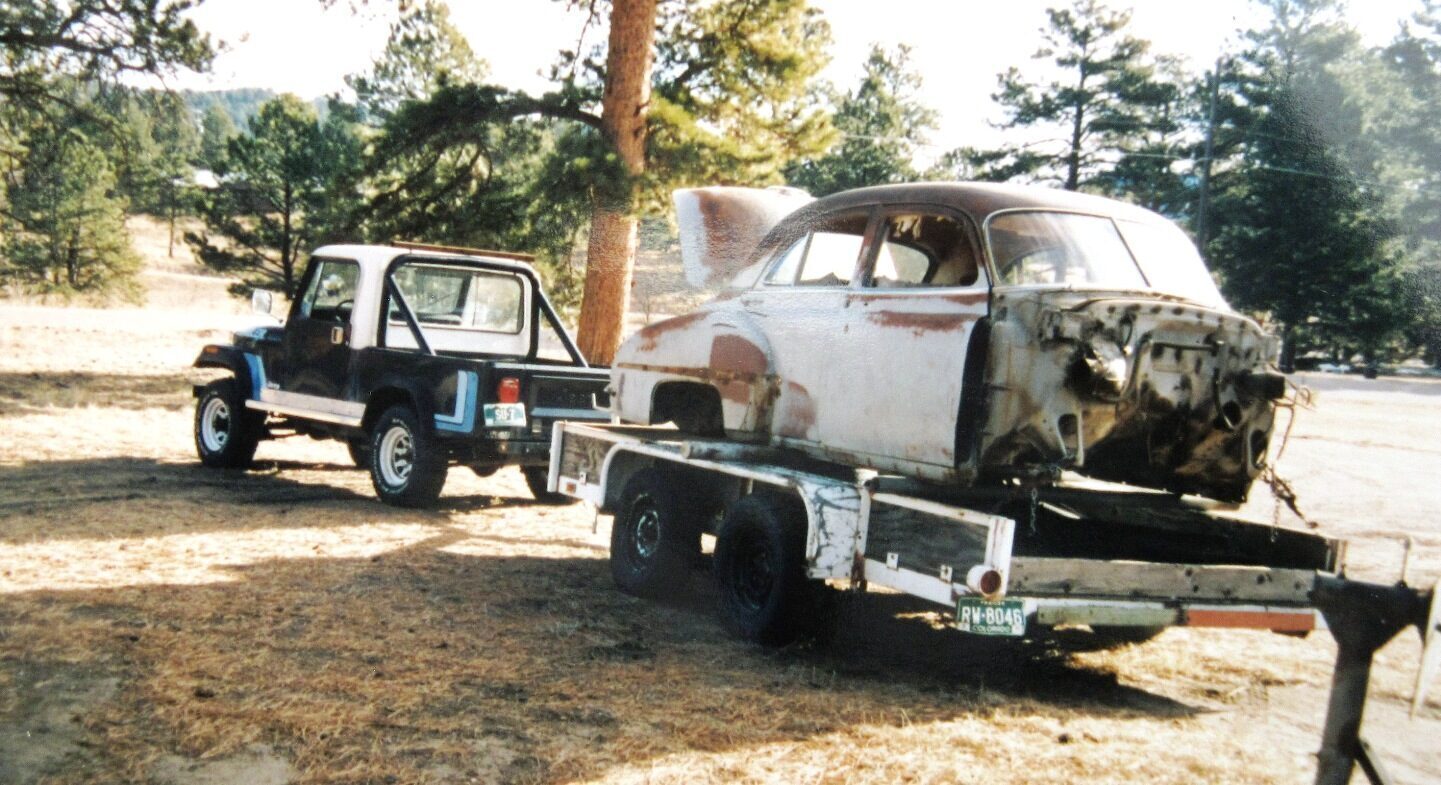
Also noted on the main page, I had purchased a 4 door from a wrecking yard in Wyoming. I used that car as a parts car for the fastback, including the frame (all of the frames are the same for the 50 Olds model 88). The gallery above shows the stripped 4 door heading to the wrecking yard.


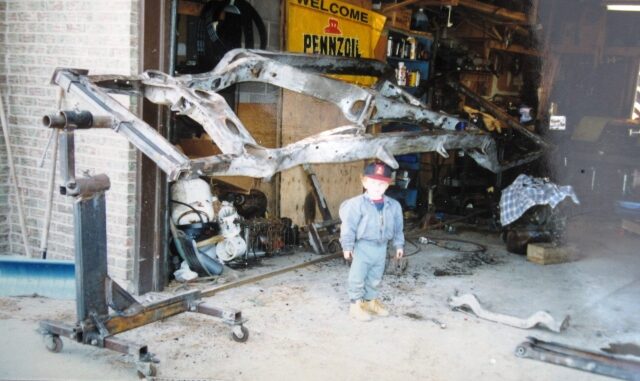
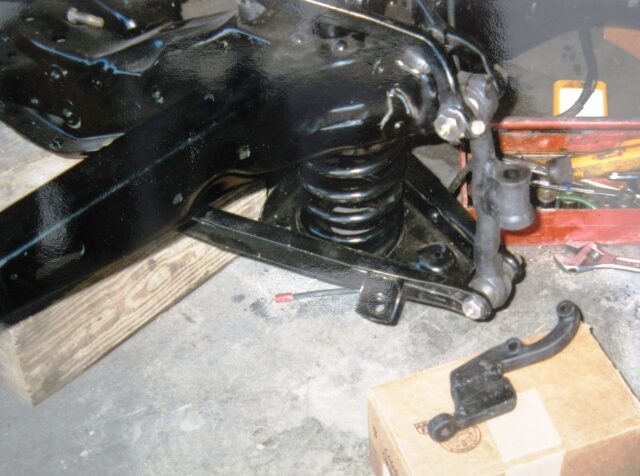
The photos above were taken about 20 years ago. The small person in the photo is my grandson who is now a geologist with a masters degree. I used two of my engine stands to create a rotisserie for the frame so that I could sandblast and paint it. As noted above this is the frame from the donor 4 door. The second photo shows the dropped spindles used to lower the car.


")

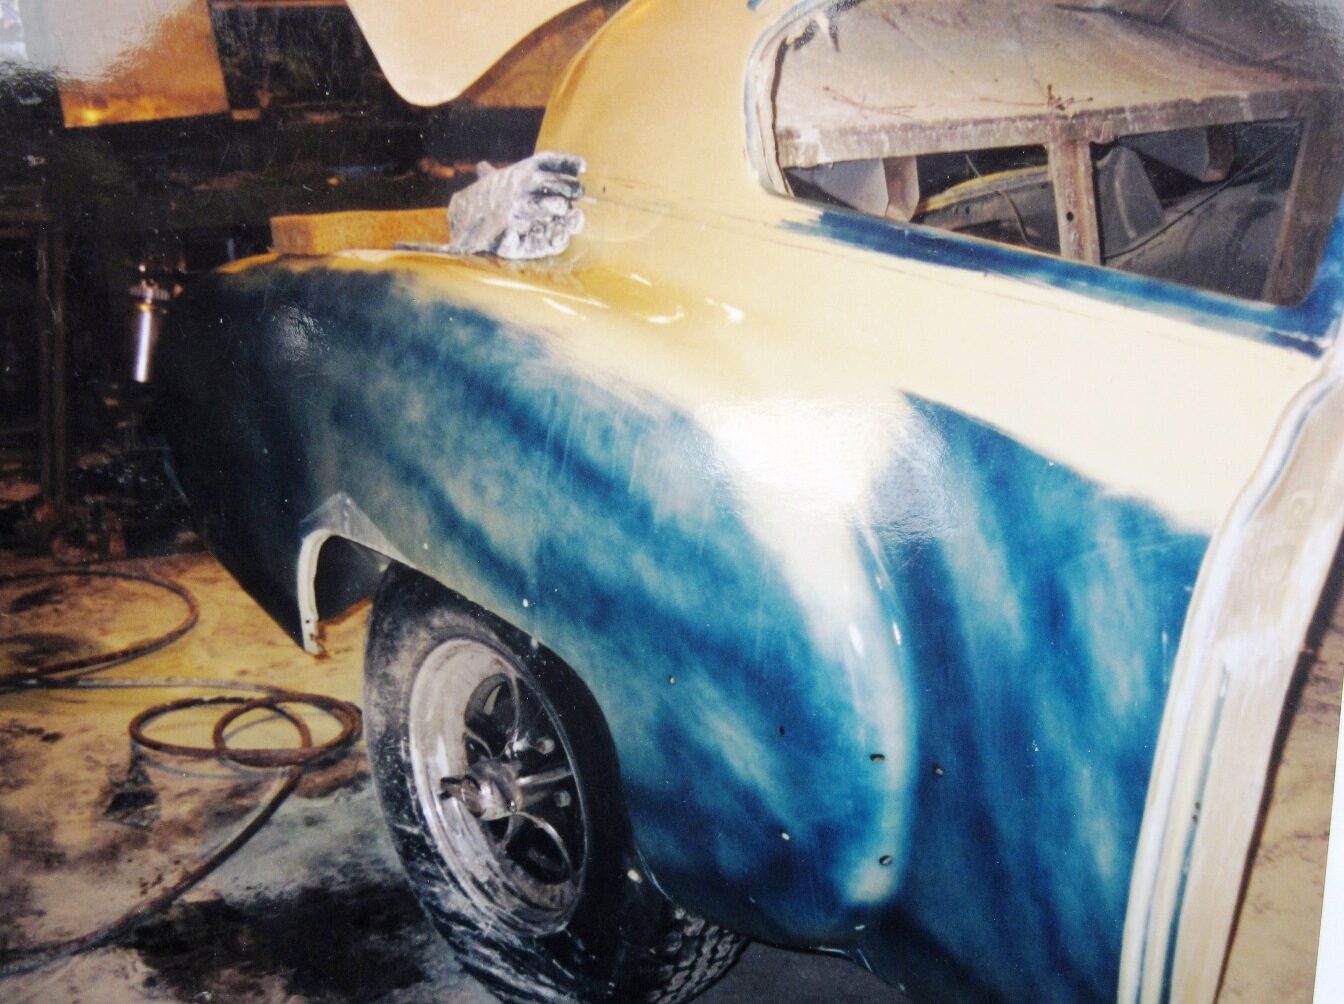


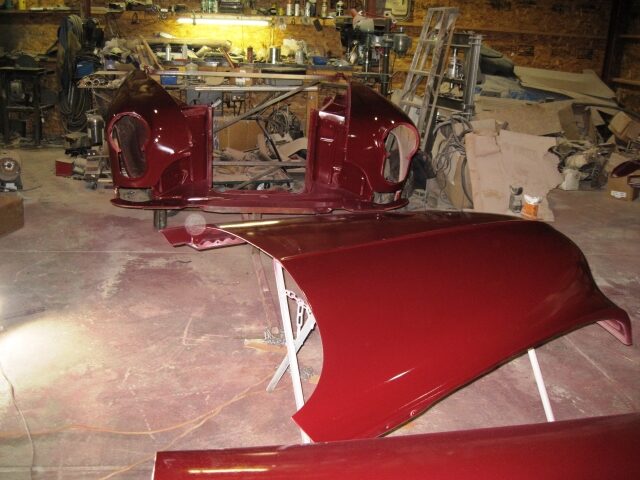
The gallery above shows some of the body/paint work. As noted, the main body was in very good condition as were the donor parts from the 4 door. The photo with the tan and black colors show the primer and the black “guide coat” used to make sure the body was straight. Two of the photos show the main body painted. My guess is that the main body was painted in the late ’90s. I then painted the doors and front end in 2018. The paint I used was quite old and did not spray well. I will assemble the car in the future and respray all of the car again after some light sanding. The paint is a single stage ’77 Corvette color.

")


The engine is quite the story. Originally I had planned to put a 303/324 early Olds engine with a belt driven supercharger. I wanted the supercharger because I was the “blower belt guy” that supported all of the top fuel NHRA racing.
A good friend called in June of 2017 and said that he had found a 1964 “Ultra High Compression” 394 cubic inch engine that was still in a Jetstar Olds. Oldsmobile made a limited run of high performance engines with 10.5:1 compression ratio. The engine was said to be in good condition.
I decided to pull the pan and check the bearings. That was a good decision as the rear two rod bearings were very bad. I ended up completely rebuilding the engine. The bearings damage cause some damage to the crankshaft which had to be welded before it could be turned to the correct diameter.
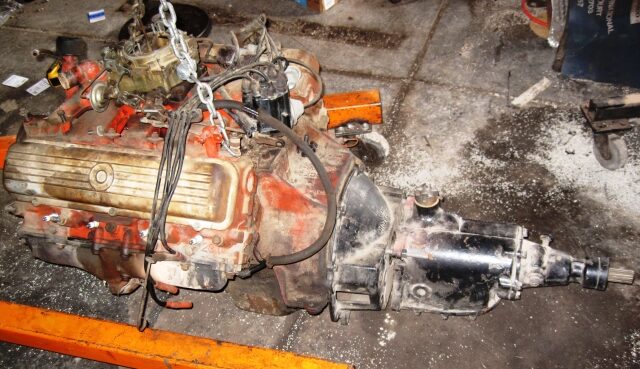
The picture of the engine and transmission is another story. The race cars of the ’50s used ’37 Cadillac LaSalle floor shift transmissions. That transmission is shown bolted to the engine. In order to mount that transmission the crankshaft must be drilled/bored in order to accept the transmission main shaft and bearing. I had a racing flywheel and that was bolted to the crank during the balancing process.
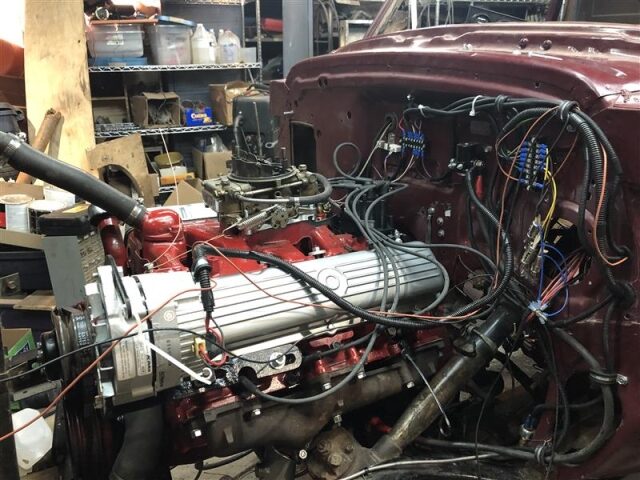
The photo of the engine in the car was taken in March of 2020, when I first fired up the rebuilt engine. The red color of the engine kind of clashes with the body color, but that is the color Oldsmobile painted their high performance engines. Unfortunately, I did not get to run the engine very long, as there were carburetor issues.
The photo of the front of the engine is yet another story. Oldsmobile only used the alloy front cover for two years (’63/’64). The earlier cast iron covers can not be bolted to that block. That cover used a different water pump ($$$$) and front motor mount. I had to suck it up and pay for the unique rebuilt water pump. I addition, I did not feel comfortable with the strength of the front cover engine mounts. Since the front cover is very rare, I did not want to risk breaking it. As a result, I made a very heavy duty front mount that bolts into the block and uses the original ’50 Olds front motor mount.
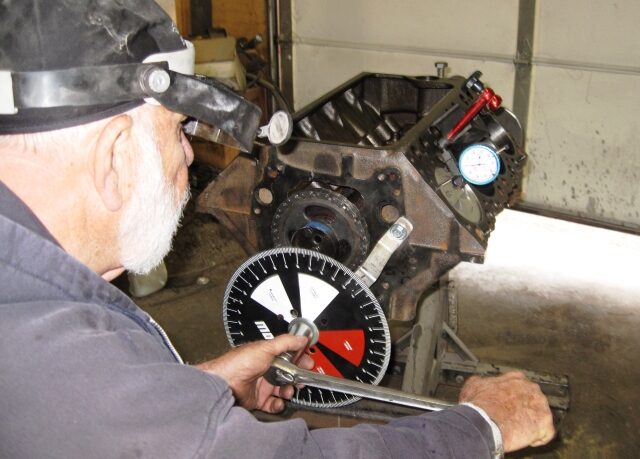
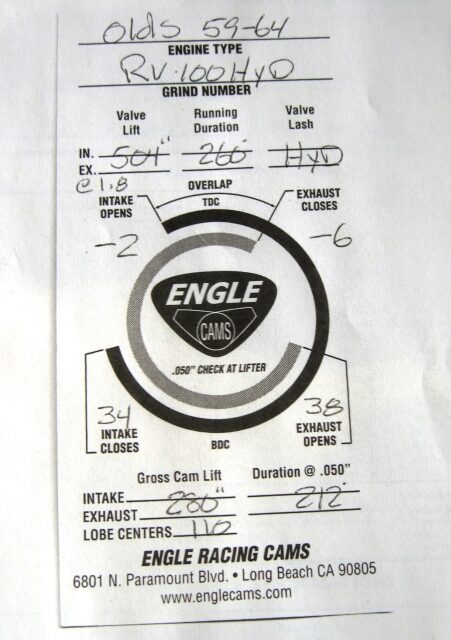
When it came to the camshaft, I wanted a semi-high performance grind. In the ’50s and ’60s the camshaft of choice for Oldsmobile engine was Engle. They are supposedly no longer in business. However, I found a guy that was associated with Engle for many years and who still grinds camshafts. My camshaft was toast. The camshaft for this year engine is also unique, but the grinder and I were able to find a blank camshaft ($$$$) and he ground it to a specification that was popular in the glory years of Engle. The other photo in the above gallery shows me “degreeing” in the camshaft and checking the specifications detailed on the spec sheet.


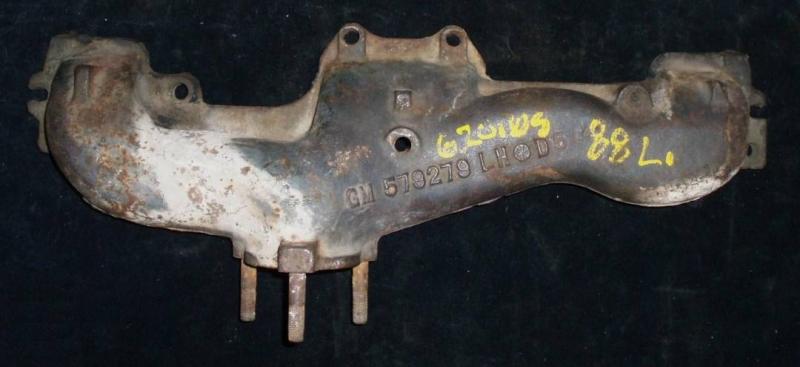


The exhaust system was another challenge. The stock passenger side exhaust manifold is made to have a “cross over” pipe bolted to it and then a single pipe running to the read. I wanted a dual exhaust system but did not like the rather primitive stock manifold. The second picture shows a driver’s side manifold that would appear to have decent flow. I bought a second driver’s side manifold and bolted it to the passenger side. Both exhaust manifolds present a plumbing challenge in order to get around the starter on the driver side and the oil filter on the passenger side. The photo with the mufflers (they should hear me coming from quite a distance {grin} shows the fabricated pipes that connect the manifolds to the mufflers. The picture with the “spaghetti plumbing” show the early stages of the rear exhaust pipes. They were a real challenge since the have to get around the rear end trailing arms.


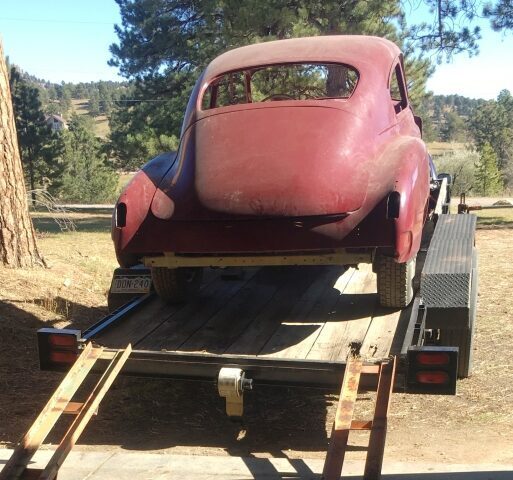
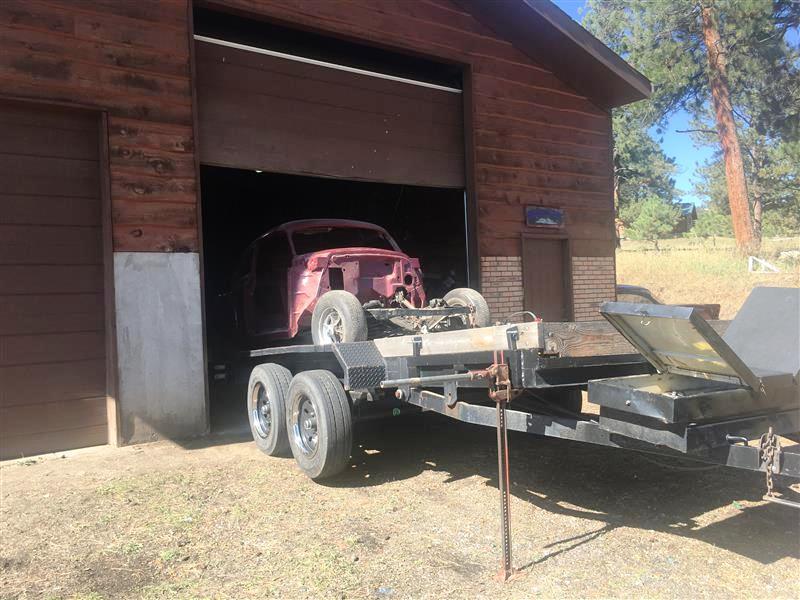
The photos above show me loading the fastback on the trailer so that I could get it inspected by the state as a part of the process of getting a title. When I bought the car it had no title. Years ago it was a simple process to get what was called a “bonded title”. It was a full legal title. Then the state changed the law so that a bonded title carried the stigma of a “salvage” title. The word salvage was clearly stated on the title. Colorado recently updated the title process to include a “re-builder” title. This still involves a bond (not a big deal) but allows a person to get a title with re-builder as part of the title. The state requires a VIN inspection to get that title. Once the car is roadworthy, a second inspection is required and then a “clear” title is issued.
Getting the inspection turned out to be a nerve wracking process. A very nice lady did the required VIN inspection. However a rather gruff male inspector looked up the info on that year car and said that there are two VIN locations — one on the door and one on the frame. Well, of course, the VIN on the frame did not agree with the VIN on the door jam. I was about to panic when the nice lady said no problem, we will put both numbers on the inspection report. Fortunately the only VIN that shows on the re-builder title is the VIN on the door.


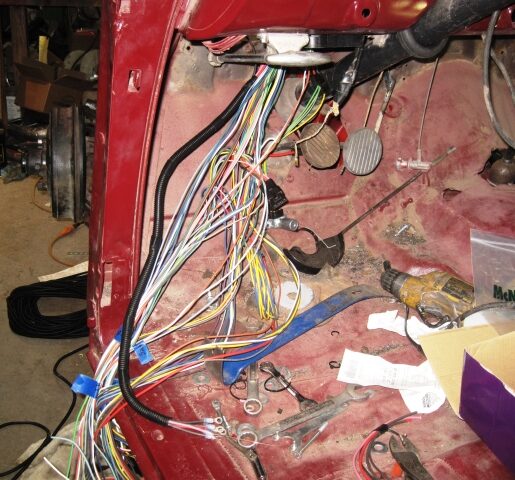


The gallery above shows the start of the wiring project. I started with a Speedway Universal 22 Circuit Wiring Harness PN 91064022. I have used this kit on my ’59 IHC truck and my ’56 Chevy. The kit is designed around a late model GM steering column with the electrical connections for turn signals, etc. However the 50 does not have that type of connection. As a result, I had to design and fabricate the rather complex relay board shown above. In addition to facilitating the turn signals and brake lights, it allows me to have the headlights on relays and has a relay triggered main and accessory circuits. You can also see the extensive use of wire loom for the various circuits.
Note, this page was update 1/30/2022. It will be updated as progress dictates
Update 12/2/2022:
I have been picking away at several small items for this project. This past week I was able to run the engine for several times for about 5-10 minutes each time. Those runs were intended to check out several engine functions and to “break-in” the camshaft.
Today (12/2/2022) was a major milestone. I drove the car for the first time since I purchased the car and started the project 28 years ago! I only drove in the driveway from the garage to the shop. Shown below are two brief videos of the first drive.
Video 1: IMG-0014
Video 2: IMG-0015
Menu: